| |
DRAWING THE UPDO HAIR
Author: Jezebel
|
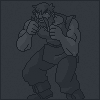
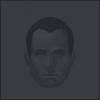
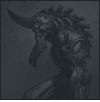
I first considered titling this walkthrough "Fun With Buns" but something just wasn't right about that. O_o This is a 5-step tutorial showing how to paint hair, this time twisted up on the head. I'm using my own hair as a reference. Only basic round photoshop brushes are used here.
NOTE: There are no hidden secrets or magic tricks to make you suddenly paint nice hair. To get good results you just need practice - I can't emphasize that enough. Its all about finding the steps that YOU are comfortable with and following through with them. I write these tutorials to serve merely as a guideline, not as a hand-holding exercise. To be quite honest, I think that if somebody out there wants their hand held, they need to find another profession/hobby because painting has a lot to do with self-exploration. Something I (or any other artist/tutorial) cannot give you. THAT said... onward to hair-dom. ^___^
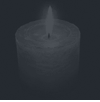
Step 1 - Starting with a medium-sized, round feather brush and a neutral base color (shown below) block in the basic shapes within your hairstyle. Shadows and highlights are vaguely defined with variations of the same color. Using a large, round feathered brush smooth out the shadows some. I went back with a small round eraser and cleaned up the edges at this point. I know what you're thinking - Did I accidently click on the blurry dog turd tutorial?
Step 2 - I think this is the most important step in the whole tutorial. If you aren't happy at this point, keep working at it or start over. Here is where you really start to define individual locks of hair and how they play against one another. Proper balance between shadows and highlights is very important to portray the texture you want. Depending on the style of your painting and how far away the subject is, if this step is done well enough you could stop right now. But for portrait painting where detail is more important, you would continue. You'll notice that no tiny strands of hair are drawn in, just clumps. Light on top of dark. It seems logical that to paint great hair, you must draw each strand... this couldn't be further from the truth. And who wants to bother with that anyway? ;) To help illustrate what I mean, I took a photo of my hair and ran the median filter on it. This breaks down the details. Simplifies it. Showing you just what you need to know (it also shows you why I didn't make a "how to draw an arrow" tutorial). From here you can see the colors and shapes at a very basic level. This is what you're going for in step 2.
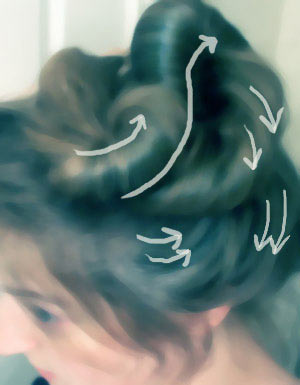
Step 3 - Hopefully step 2 looks good, giving you a solid base to work from. Using a small feathered brush, we're pulling out the shadows from within the knots. They creep out onto the bulk of the hair, giving it depth. Using a lighter, more saturated color (kind of yellow orange, shown below) we're drawing in highlights. Locks of hair are curving around the head giving the style a somewhat bulbous look. Again, we're using that whole "light/dark balance" thing to show depth :)
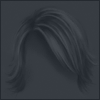
Step 4 - By now we've switched over to fine, hard-edged brushes to detail the hairstyle. Don't get in too big of a hurry to slap down hair. If the direction/flow of the hair doesn't make sense, your painting could look really funky. For those of you that still are not understanding the way things have built up, I made an animated gif showing the different layers. Note that only 4 colors are used, none of which are extremely dark or bright.
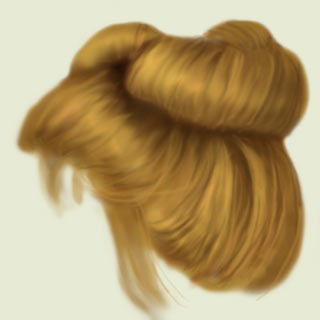
Step 5 - Final step! This is basically a continuation of step 4, we've just gotten down to the smaller clumps of hair. I included a small image of just the "wispies" on the side. I think the wild strands of hair left behind are very important to making a head of hair look realistic. It can also say a lot about a character's personality. Hair that is pulled back tight enough to peel off a person's eyelids might show they are stern or strict. Whereas loose hair, with strands hanging out everywhich way might portray someone who is carefree (or careless?). In my opinion, the last step is the only place where you should paint individual hairs. They are the finishing touches. And on that note... viola! Hair! You're done! Now stop reading and go paint!
|